How to Change a Tire (Including When the Lug Nuts Won’t Budge)
A spare tire is only useful if you know how to put it on, and that is worth learning before the day you actually need it. The job is straightforward: a jack, a wrench, your spare, and the right sequence of steps. Do it once in your driveway on a calm afternoon and it stops being intimidating forever. Here is the full walkthrough, plus what to do when a lug nut will not come loose.
✦Dive deeper on this topic
Get Yourself Somewhere Safe
Before anything else, get off the road. Pull over somewhere level and flat, well away from traffic. A parking lot is ideal, but a wide shoulder works, and try to stop on a straight stretch rather than a curve so oncoming drivers can see you. Turn on your hazards.
Here is a mindset worth having: yes, driving on a flat can chew up your rim and your tire, but your safety comes first every time. It is far better to ruin a rim limping to a safe spot than to crouch beside your car somewhere a passing vehicle could hit you. A rim can be replaced. You cannot.
Set the Car So It Cannot Move
Once you are parked safely, lock everything down. Put an automatic in park or a manual in gear, set the parking brake, and turn off the engine. Then block the wheel at the opposite end from your flat using whatever you have on hand, a brick, a chunk of wood, a solid rock. This keeps the car from rolling while it is up in the air, which is exactly what you want.
Find Your Spare and Your Tools
If you have never gone looking for your spare, now is a good time to know where it is stored, ideally before you are on the shoulder of 35W. On most cars, the spare lives in a well under the trunk floor, tucked beneath the carpet panel. Lift that up and you will usually find the spare, the jack, and the lug wrench stored together. On many SUVs and trucks, the spare is mounted underneath the rear of the vehicle and lowers down with a crank, and on some it hangs on the back door or tailgate.
Your owner’s manual will tell you exactly where yours is and how to release it, which is genuinely worth a two-minute look on a calm day rather than figuring it out in the rain or when you’re stressed. While you’re at it, two things worth knowing: some newer vehicles skip the spare entirely and come with a tire inflator and sealant kit instead, so check what you actually have before you need it. And if you do have a spare, make sure to check the air pressure occasionally, because a flat spare is no help at all.
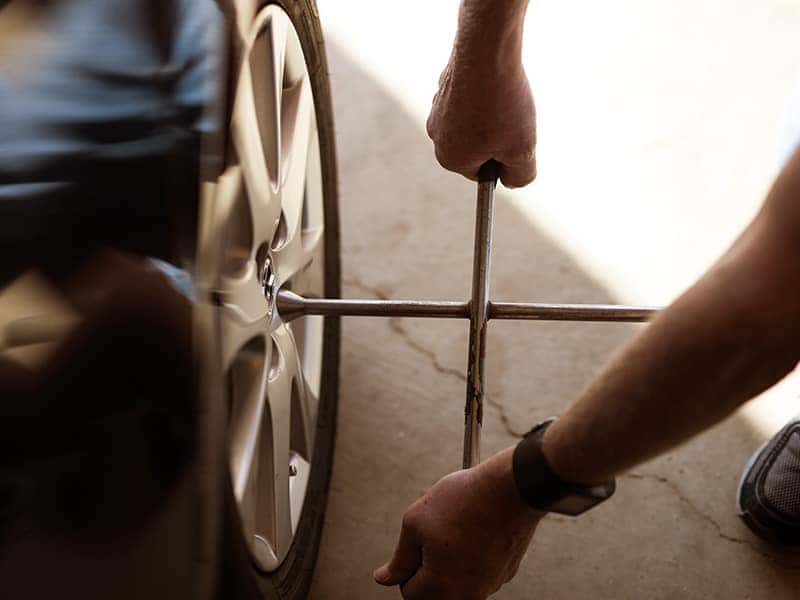
Loosen the Lug Nuts Before You Lift
This is the step people get backwards, so it is worth saying clearly: loosen the lug nuts while the tire is still on the ground, before you jack the car up.
The weight of the car holds the wheel still and gives you something to push against. If you lift first, the wheel just spins and you cannot get any leverage. If your wheel has a hubcap or cover, pry it off first to reach the nuts. Then take your lug wrench and turn counterclockwise. The old “lefty-loosey, righty-tighty” rule applies. You are only breaking them loose here, about half a turn each. Do not unscrew them all the way yet.
This is also where you might hit a wall, so if a nut will not move, skip down to the stuck lug nut section below before you wear yourself out.
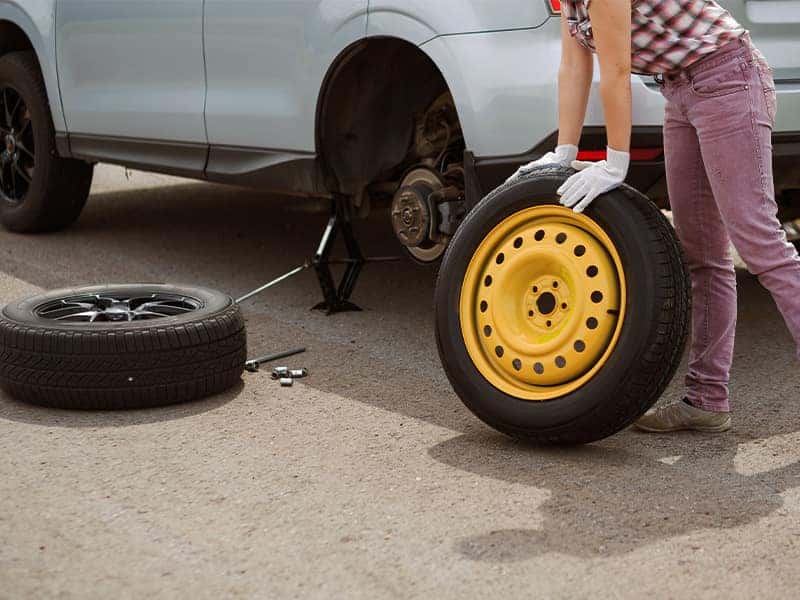
Jack It Up the Right Way
Your owner’s manual will show you the correct jack point for your specific vehicle. This matters more than people think, because putting the jack in the wrong spot can damage the car or let it slip. Once the jack is positioned, raise the car until the flat tire is a few inches off the ground.
One hard rule here, no exceptions: never put any part of your body under the vehicle while it is up on the jack. A jack holds a car for a tire change, not for you to climb under.
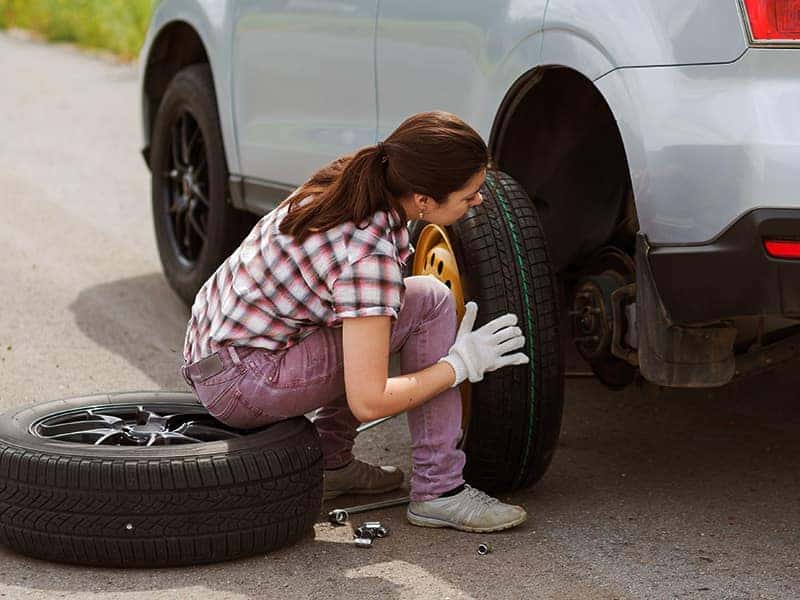
Swap the Tire
Now finish unscrewing the loosened lug nuts the rest of the way by hand and set them somewhere you will not lose them, like an upside-down hubcap. Pull the flat straight off and set it aside.
Line up the holes in your spare with the bolts on the wheel and slide it on, keeping it straight and pushing it flush. Thread the lug nuts back on by hand until they are snug. One detail that is easy to miss: if your lug nuts have a tapered, cone-shaped end, that end goes toward the wheel. The taper helps center the wheel on the studs so it sits true.
Tighten in a Star Pattern
Lower the car until the spare is just touching the ground and bearing a little weight, but not all of it yet. Now tighten the lug nuts, and the pattern matters: tighten one, then move to the one directly across from it rather than the one next to it. On a five-lug wheel this traces a star shape. Crisscrossing like this pulls the wheel down evenly and seats it straight, where going around in a circle can leave it lopsided.
Once they are all snug in that pattern, lower the car the rest of the way to the ground and give the nuts a final firm tightening.
When a Lug Nut Just Won’t Budge
Here is the part most guides gloss over. Sometimes a lug nut is on so tight it feels welded in place. Usually this is because a shop ran it on with an impact gun and over-torqued it, or because road salt and corrosion have seized it up, which we see plenty of around here. Do not assume you are doing something wrong. Work through these in order.
Get more leverage with a breaker bar. A breaker bar is a long, non-ratcheting handle that takes a socket, and the extra length multiplies your force. Fit it on the nut and position it so you can press down with your body weight instead of yanking. This is the safest first move and the least likely to damage anything. If you do not carry one, it is a cheap, worthwhile addition to your trunk kit.
Add a cheater bar for even more reach. If the breaker bar alone is not enough, slide a length of steel pipe over the end to extend it further. More length means more force at the nut. If you have a second person, have them hold the socket squarely on the nut so it does not slip off and round the corners.
Let WD-40 do the work. If the nut is rusted or corroded on, spray it with WD-40, then give it at least 10 to 15 minutes to seep into the threads before trying again. Patience pays here. A second application is fair game if the first does not free it. This is the trick most worth knowing in salt country.
Know When to Call It
If you have tried leverage and given the WD-40 time and a nut still will not move, that is your signal to stop, not to escalate. Forcing it can round off the nut or snap a stud, which turns a simple flat into a far bigger repair. There is no shame in it, over-torqued nuts defeat plenty of people.
That is exactly when to let us help. Our Walser service team can get a seized or over-tightened nut off safely with the right equipment, check whether your flat can be repaired or needs replacing, and make sure your tires are torqued correctly so the next change is not a wrestling match. If you are stranded, roadside assistance can also get you moving.
Hit a nut that won’t budge?
Reach out to a Walser location near you and we will take it from there.
Donut or Full-Size Spare? It Changes What You Do Next
Before you drive off, it helps to know which kind of spare you just put on, because they are not the same beast.
A compact temporary spare, the “donut,” is the small, skinny one most cars carry. It is built to get you to a shop, not to drive around on. Donuts are speed and distance limited, usually to around 50 miles per hour and no more than 50 to 70 miles total, and you will often see that printed right on the sidewall. They also throw off your handling and can confuse systems like ABS and traction control, so the rule is simple: drive gently, stay off the highway if you can, and head straight for help.
A full-size spare is the same size as your regular tires and is far more forgiving. You can drive on it more normally and for longer. Even so, it is usually an older tire that has been sitting in your trunk, and it may not match the tread or wear of your other three, so it is still worth getting your flat sorted soon rather than treating the spare as permanent.
What to Do Once You’re Back on the Road
Changing the tire is not quite the finish line. A few things to square away once you are rolling again.
Check the spare’s air pressure as soon as you reasonably can, since a spare that has sat for years is often low. If you have a gauge, check it before you get going; if not, a gas station air pump works.
Get your flat looked at quickly rather than living on the spare. Many flats from a nail or screw can be repaired for far less than a new tire, but only if the damage is caught early and is in the repairable part of the tread. Driving on it flat or waiting too long can turn a fixable tire into a replacement.
Toss the flat, the jack, and your tools back in the trunk, and make sure nothing is left on the road. And once your regular tire is back on, have the shop confirm everything is torqued correctly, which also spares you a wrestling match the next time you need to take that wheel off.
The Bottom Line
Here is the thing to take away from all of this: changing a spare is not about strength, it is about sequence. Almost every part of this job that goes wrong goes wrong because a step happened out of order, not because someone was not strong enough.
Get the order right and the muscle takes care of itself. And on the one step that genuinely can out-stubborn you, a seized lug nut, knowing when to stop and hand it off is its own kind of skill.
Either way, you are back on the road, which is the whole point.
Find a Walser Location Near You
Whether you are dealing with a stuck lug nut, a flat that needs a look, or just want your tires torqued right, there is a Walser service center close by ready to help.
Disclaimer: This guide is for general informational purposes only and is not a substitute for your vehicle owner’s manual or professional service. Always follow the specific instructions and jack points for your make and model. Changing a tire involves working with a raised vehicle and can be dangerous if done improperly. If you are ever unsure, do not feel safe, or are in an unsafe location such as a busy roadway, do not attempt the change yourself. Contact roadside assistance or a professional for help. Walser Automotive Group is not responsible for any injury, vehicle damage, or loss resulting from attempting to change a tire based on this guide.
 Avoid the Sticker Shock. Buy Now Before Tariffs Take Effect! March 31, 2025 Major auto tariffs are set to take effect on April 3, and industry experts predict that new vehicle prices could rise by thousands. If you’ve been thinking about buying a…
New Vehicles, News, Used Vehicles
 What It Means to Live in a Severe Weather State: Minnesota Edition September 16, 2025 When you hear the phrase “severe weather state,” it might sound a little overly-dramatic. But, if you’ve lived in Minnesota long enough, you know it’s just a way of life.…
Maintenance, Minnesota, Safety
 Thinking About Leasing Your First Car? Here’s How to Not Get Lost in the Fine Print June 12, 2026 If you've never leased a car before, the whole thing can feel like a different language. Big numbers, weird terms, a payment that sounds amazing until you read the small…
Lease & Finance Deals, Walser Automotive Group
 Selling Your Car Before Moving Out of State? Here’s How to Do It Without the Stress. February 25, 2025 The "Oh No, My Car" Moment Picture this: You’re knee-deep in moving boxes, drowning in packing tape, and questioning every decision that led to owning so many coffee mugs. Then,…
WalserBuysCars